As our second task, I want to take one of the preset styles and save it in an area where I can work on and alter it. We'll do that and, in the process, illustrate the SAVE, COPY, PASTE, and DELETE options.
Saving the Currently Loaded Style
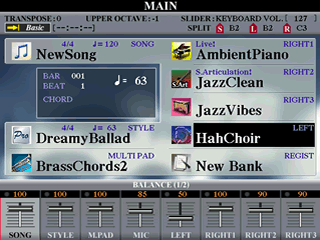 In
the lesson on New Folders, I had located and loaded the DreamyBallad style
from the Swing&Jazz category. On the MAIN screen, you can see that it
is still the currently loaded style. I am going to save that file on my USB
drive. To do that, I return to the STYLE display screen by selecting [D].
It will open at the location of the currently loaded style, which will be
in the PRESET area in the Swing&Jazz styles folder. I use the [TAB]
key to move over to the USB storage area.
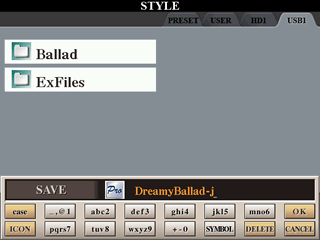 In
this screen shot, I have moved to the USB area and selected the SAVE option
to save the DreamyBallad style. The Name Input
Box for the SAVE option opens and the current
name -- "DreamyBallad" -- is placed in the Input Box. Rather than saving
the file under the current name, I am going to change it slightly to indicate
that it will be "my" version
of this style. I do that by adding my first initial (j for Joe) to
the end of the style name. You can see this modification in the Input box.
I am happy with the "new" name,
so the next step is to select OK to complete
the style save process.
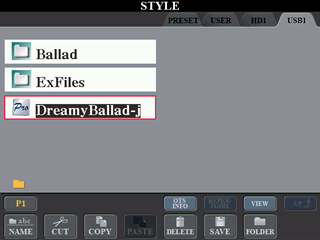 I
am returned to the STYLE display screen and the style file, DreamyBallad-j,
is now saved on the USB drive. Note that it is saved at the root level of
that drive and not in the Ballad folder.
I could have achieved this same result from the initial STYLE display screen in the PRESET area by choosing the COPY option, selecting DreamyBallad, tabbing over to the USB area, and then selecting the PASTE option. The PASTE Name input box would open and I could alter the name as desired before completing the PASTE operation.
Using the Copy/Paste Option
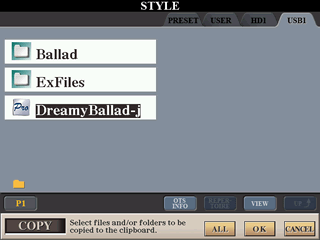 I
actually want this style in the Ballad folder,
not at the root level. So, let's use the COPY and PASTE options to copy
the file from the root level to the Ballad folder.
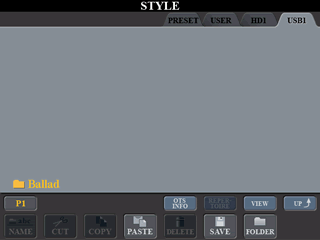
First, select the COPY option. When asked to
select files and/or folders, select the DreamyBallad-j style
as illustrated in this figure. To complete the selection process, press the OK button.
 Now,
move to the Ballad folder, where we want to store the copy of this style,
which is now on the clipboard. Pressing the [A] button selects
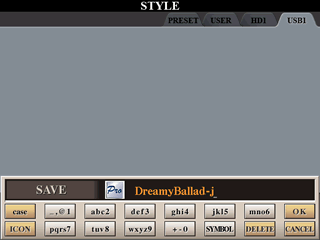
the Ballad folder and opens it. As you can see,
there are currently no files in this folder. Since we have copied a file
and it is on the clipboard, the PASTE option is now available and I select it.
 The
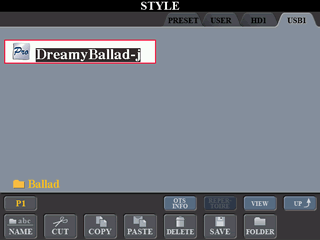
SAVE NAME input box opens with the current file name inserted. We
are not going to change the name, so accept this choice and select OK to
complete the paste operation.
 We
are returned to the STYLE display screen within the Ballad folder. You can
see the file we copied to the clipboard is now saved within the Ballad
folder.
We don't need two copies of this file so, now that the file is correctly located in the Ballad folder, let's return to the root folder of the USB drive and delete the copy there.
Deleting a File
 To
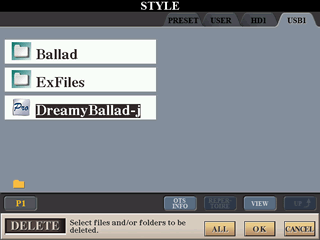
return to the root of the USB drive from the Ballad folder, select the UP option.
This moves you up to the parent directory of the Ballad folder, which, in
this case, is the top level of the USB drive.
Here you see the original file that we had copied as well as the two folders. Select the DELETE option and, when asked to select the files and/or folders to be deleted, select the DreamyBallad-j style and then press OK.
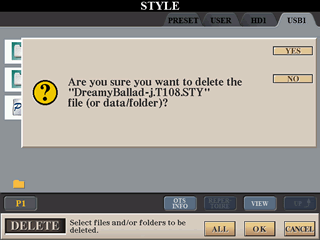 Since
deleting anything is a permanent action, you are presented with a confirmation
message box that asks whether you are sure you want to delete this file.
It shows the name of the file(s) that will be deleted. If this is correct,
confirm the deletion by selecting the YES option.
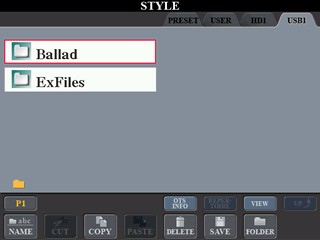 This
deletes the selected file and returns you to the STYLE display screen. As
you can see, the DreamyBallad-j style is gone
from the root level directory. However, the copy we made is still in the Ballad folder.
What's Next?
We want to modify this style to suit our own preferences. In future lessons, you will learn a great deal about how you can modify any particular style. For now, the next lesson will show you how to make some simple changes in the OTS of the style and then save those changes in "your" version of the style.
This page updated on September 19, 2024 .