In the Preset Voices lesson, when you tried out some voices, I asked you to make sure that the ACMP button was OFF. Why is that? If ACMP is ON, your keyboard will be split into two parts. Keys on the left side are used to indicate a style. If you tried playing notes with your left hand, you may have been surprised to discover the rhythm and other voices kicking in. If you pressed different notes with your left hand, the sound may have changed, but in strange ways not reflecting the actual notes you were playing, unlike the right hand. To play all 66 keys as a single keyboard, the keyboard should not be "split" into two separate parts.
To take advantage of the auto accompaniment features, however, we need to divide the keyboard into a left-hand section and a right-hand section. The left-hand section controls the accompaniment while the right-hand section is used to play the melody using the RIGHT1 voice (and/or the RIGHT2 and RIGHT3 voices). The default "Split Point" divides the two sections at F#2 (see illustration). All the keys to the left of this split point, from C1 up to and including F#2, are in the Auto Accompaniment section. Keys that you press in this section define a "chord" and control the accompaniment. Keys to the right of the split point (from G2 up through C6) are for playing the melody of a song.
On the PSR-SX900 how you find and change the split point is different than on earlier Tyros and PSR models. Let's first look at how this is done on the SX900.
Changing the Split Point on the SX900
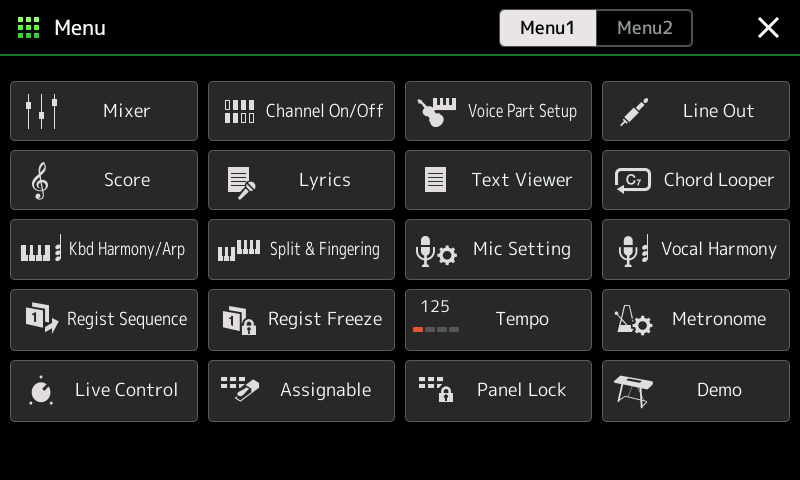 There is no information directly on the Home screen about the current split point. To examine the split point, push the [Menu] button to bring up the Menu1 screen. There you find the option "Split & Fingering". Touch that option to bring up the Split Point & Fingering screen (shown below). From this screen you can see the current setting and change it if you want.
If you want quick access to the Split Point & Fingering screen, you can always make it one of your assignable buttons.
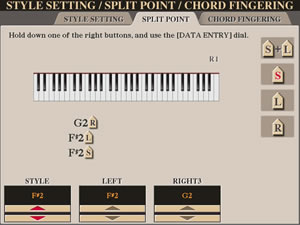
In this illustration, the left voice is not on and neither are the R2 or R3 voices. The Chord area is everything to the left of F#2. The R1 voice is played on the keys from G2 up to C6.

 Here is another screen shot where the left voice is on and all three right voices are playing. If you wanted to move the split point to the right, say to B2, you can do that in several different ways. Hold down the "Split+Left" option and then press the key on your keyboard where you want the split to be. This changes the split point for both the left voice and the style. You can touch the arrows next to the Style, Left, and Right3 options and increase or decrease the displayed setting.
Changing the Split Point on Tyros/PSR Models
 All
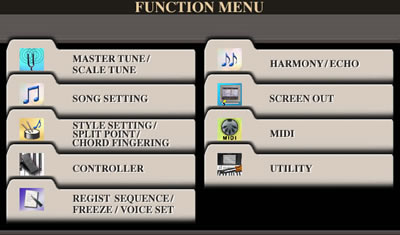
the keyboards Tyros and PSR models have a key labeled [FUNCTION] that opens a menu of
various keyboard features that you can control. The screen shot here shows the Tyros3, but
all the Tyros and PSR-S keyboards have a similar set of choices under FUNCTION.
All
the keyboards Tyros and PSR models have a key labeled [FUNCTION] that opens a menu of
various keyboard features that you can control. The screen shot here shows the Tyros3, but
all the Tyros and PSR-S keyboards have a similar set of choices under FUNCTION.
The third set of choices shown in the FUNCTION MENU, next to the [C] button, allow you to change the split point and the chord fingering mode. The split point options sre the same as in the SX900 shown above except that PSR models will not have an option for changing the R3 voice.
Note that you can visually check where the current split point is by looking at the upper right-hand corner of the MAIN screen. There you will see the current setting for the SPLIT. The "S" indicates the note that marks the split point for auto accompaniment (F#2). The "L" marks the upper range of the left-hand voice (also F#2 initially). Initially, the auto-accompaniment section is exactly the same as the notes used for the left-hand voice, but it doesn't necessarily have to be. The "R" indicates the lowest note available for the right-hand voice.
Tyros4 and Tyros5 owners will not see that split point indication on their MAIN screens. With the Tyros4, Yamaha introduced a new feature that allows a user to define a separate area on the right side of the keyboard for the R3 voice only with an R3 split point. The R1+R2 voices would play above the left-hand split point and below the R3 split point. If the R3 split point is set to be right above the Left split point, for example Left and Style set at F#2 and Right3 set at G2, then the three right-hand voices would all play on the right side of the keyboard.
 You
can immediately jump to the SPLIT POINT screen by pressing
the [DIRECT ACCESS] button together with the [SYNC START] button. Alternatively,
use the FUNCTION menu to go to the SPLIT POINT screen. Use the buttons below
the screen to change any of these points. Note that if you move the right-hand
voice lower, the split point and the left-hand voice must always be below
the right-hand voice, so you may wind up moving all three points by moving
the R voice lower. Similarly, moving the Style split point higher will also
bump up the L and R voices since neither can be below the S split point.
You
can immediately jump to the SPLIT POINT screen by pressing
the [DIRECT ACCESS] button together with the [SYNC START] button. Alternatively,
use the FUNCTION menu to go to the SPLIT POINT screen. Use the buttons below
the screen to change any of these points. Note that if you move the right-hand
voice lower, the split point and the left-hand voice must always be below
the right-hand voice, so you may wind up moving all three points by moving
the R voice lower. Similarly, moving the Style split point higher will also
bump up the L and R voices since neither can be below the S split point.
You can also use the buttons on the right side of the display screen to move the split point. For example, press the [F] button, next to the S+L option shown on the screen, and then press the actual key on the keyboard where you want this split to occur and this will set both the "S" and "L" points at that key.
Let's Hear the Band
OK, turn that ACMP On. Press the SYNC START button. Now, as soon as you press one of the keys in the left-hand auto accompaniment section, the style you have selected starts playing. Try it now. With one finger, hit the note "C1". (You could hit "C2" instead, because that note is also in the Auto Accompaniment section.) The style you selected starts playing. This will include the drums, the bass, and the other instruments included in the style. They will be playing together and, because you pressed the "C" note, they will be playing an accompaniment in the C major chord. Now press the G1 note and the accompaniment switches to the G major chord. Try F1 and the accompaniment switches to the F major chord. You signal any major chord by simply pressing the root value of that chord. The sound of the accompaniment switches automatically as soon as you press the new chord. On the MAIN screen, you will see a CHORD setting that shows you which chord the keyboard is currently playing.
At this point you could also try out the different variations of whatever style you are playing. Press the "B" Main button to hear the second variation. Similarly, try the "C" and "D" variations and try different chords in each variation.
Resetting Fingering Mode
If your keyboard is new and you are still using the default settings, the chords mentioned above will be working because the default setting of the keyboard for chord recognition is "Multi-Finger". In this setting, the keyboard recognizes single-finger chords, like pressing "C1" to get the C major chord. Multi-Finger mode also recognize fingered chords. If, using your left hand, you pressed simultaneously C1 and E1 and G1, the three notes in the C major chord, the keyboard would also recognize this as C major. If you added a fourth note, say A1, that is, C-E-G-A, the keyboard would recognize this as C major sixth -- a chord that is not available in the single-finger mode. There are several different fingering modes that you can use. When you find the one that you like, your keyboard can be set to remember that and use that as your normal fingering mode. Before describing the various fingering modes, let's see how you find the fingering mode and set it. Again, the interface on the touch-screen models differs from that on earlier keyboards.
Setting the Fingering Mode on PSR-SX900
The Split Point & Fingering screen shows the current Fingering Type in the bottom right-hand corner. The default type is Single. Touch the indicated fingering type to open up a dialog box where you can set the fingering mode to whatever you want. This box lists all of the available fingering types in two pages. The illustration is showing the first of the two pages (1/2) and the Fingered option is selected. Touch the down arrow to see additional fingering options. Touch the Close option to close this dialog box.

Setting the Fingering Mode on Tyros/PSR models
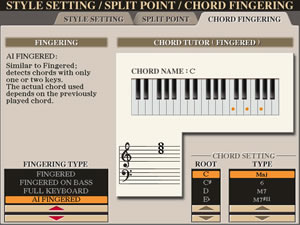 Use the [FUNCTION] button to bring up the "Style Setting/Split Point/Chord Fingering" screen.
CHORD FINGERING is the third tab in this display screen, so use the [NEXT] tab button
to tab over to the third option. All of the fingering options are shown in
the FINGERING TYPE box in the lower left-hand part of the screen. This box
spans the [1], [2], and [3] buttons that are located at the bottom of your screen. Any of these buttons can be used to scroll
up and down this list of fingering types. For each type, you see a brief
description of that type in the text shown under the FINGERING column.
Use the [FUNCTION] button to bring up the "Style Setting/Split Point/Chord Fingering" screen.
CHORD FINGERING is the third tab in this display screen, so use the [NEXT] tab button
to tab over to the third option. All of the fingering options are shown in
the FINGERING TYPE box in the lower left-hand part of the screen. This box
spans the [1], [2], and [3] buttons that are located at the bottom of your screen. Any of these buttons can be used to scroll
up and down this list of fingering types. For each type, you see a brief
description of that type in the text shown under the FINGERING column.
The quickest way to check your fingering mode, and change it if necessary, is to press the [DIRECT ACCESS] button and then press the [ACMP] button. This takes you immediately to the CHORD FINGERING screen where you can set your fingering option. Press the [EXIT] button to leave this screen and return to the MAIN menu. The chord fingering you select remains selected even after you turn your keyboard off.
Fingering Types
There are several different ways you can signal to the keyboard what chord you want. The method of indicating a chord depends on the "Fingering Type." There are 7 different fingering types. Let's look at some of your choices.
Single Finger
The simplest method is to use the single-finger approach. This is the SINGLE FINGER type. Using the single-finger method, you can easily play all major, minor, seventh, and minor seventh chords:
- In this mode, you need only press a single key, the "root" value of the chord, as described above to trigger any major chord.
- For a minor chord, you press two keys at once, the root key and a black key to the left of that root. For example, to signal the Em chord, you would press simultaneously the Eb1 (the first black key to the left of the E key) key and the E1 key .
- For the seventh chord, simultaneously press the root key and a white key to its left. (E7 would be signaled by pressing simultaneously D1 and E1.)
- For a minor seventh chord, simultaneously press the root key and both a white and black key to its left. (Em7 would require pressing D1 and Eb1 and E1 all at the same time.)
The Single-Finger method does not enable you to play a C major seventh (CM7) or C augmented (C+) or C major sixth (C6) or C diminished (Cdim) or C ninth (C9) chords. The single-finger method would work for very simple songs, but could not be used to play more modern tunes using fancier chords.
Fingered
In this mode, you play the individual notes of the chord in your left hand. At least three notes are needed to trigger a chord. For a C major chord, you would play C + E + G, pressing all three notes down at the same time. You do not have to play the chord with the root of the chord, in this case, a "C", on the bottom. You could also signal the C major chord by playing different "inversions" of that chord, for example, E-G-C (the root of the chord is on top) or G-C-E (the root of the chord is in the middle). A C major seventh chord consists of the four notes C-E-G-B. You could signal a CM7 by playing those four notes in any inversion. (C-E-G-B, E-G-B-C, G-B-C-E, or B-C-E-G).
PSR-Tyros Chord Tutor - If you are not sure of what notes are included in any particular chord, there is a chord tutor available. On the Tyros and PSR models the chord tutor is on that CHORD FINGERING page (see above illustration.) Select the chord you want in the ROOT box (pressing the [#6] button) and then select the type of chord using either the [#7] or [#8] buttons. The notes for that chord will be shown on the keyboard in the illustration. If you use the chord tutor for root "C" and type "M7", the illustration shows the notes C-E-(G)-B. The "circled" G note means this note is optional for this chord, that is, playing C-E-B would be sufficient to indicate a CM7 chord.
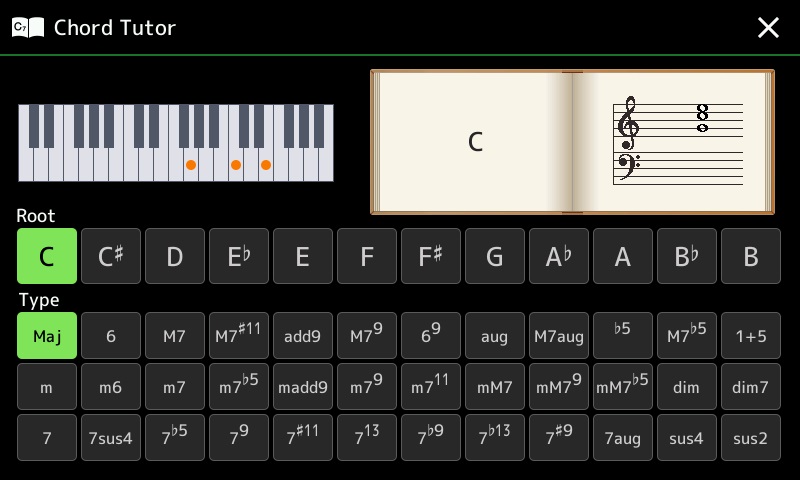
PSR-SX900 Chord Tutor - The PSR-SX900 has a separate screen for the Chord Tutor. You find this option on Menu2. The Chord Tutor screen is shown below. In this screen shot, the selected chord is C Maj. The circles on the keyboard show the keys that trigger this chord. The graphic illustrates these notes on sheet music. Touch any root note and the type of chord to see the notes used to trigger that chord.
In this mode, which I personally prefer, you need to simultaneously press three or more keys to trigger a chord. This means you can play a chord and then play single or double notes to add variety to the accompaniment voice without triggering a chord change.
Fingered on Bass
This type is essentially the same as FINGERED except that the bass note used in the accompaniment is the lowest note you use in specifying your chord. So if you wanted to play the C major chord while the bass played an "E", you would play the second inversion of the C chord, that is, E1-G1-C2, with the lowest note being the E. In musical notation, you might see this chord entered as C/E, which means to play the C major chord over an E bass note. Of course, in this case, E is also part of the chord. But you will also come across chords like Bb/C, which means play the Bb chord along with a C bass, which is not part of the Bb major chord.
Multi Finger
The MULTI FINGER type automatically detects SINGLE FINGER or FINGERED chords, so you can use either type of fingering without having to switch fingering modes. I find this type, which is the default setting from the factory, cumbersome. If you try to finger a chord of 3 or more notes, but don't hit all the keys at exactly the same time, any stray keystroke gets immediately interpreted as a single-finger chord and the accompaniment switches to that chord, which produces an undesirable accompaniment sound.
Additional Fingering Types
If you are used to playing piano arrangements, you may want to experiment with the FULL KEYBOARD mode where notes from both the left and right hand are used to identify the chord. There is also an AI FINGERED or AI FULL KEYBOARD mode that you can select. "AI" stands for Artificial Intelligence. The AI FINGERED is the same as FINGERED, except that a new chord can be signaled with less than three notes. The AI is used to figure out what chord you mean based on the previously played chord. Personally, I've avoided these "AI" modes since the more advanced chords, such as the 9ths and 13ths can not be selected and the chords that are selected can be very strange indeed.
Well, now you know how to select a style and try out the different variations of that style with the keyboard split point and fingering set the way you want. In the next lesson, we'll look at the one-touch settings included with each style and some of the remaining style control buttons.
This page updated on September 19, 2024 .